So, you have gotten that amazing motorcycle that you have been dreaming about for so long. You are still relishing that sense of freedom that this has given you when, all of a sudden, it dawns on you that you actually, at some point, need to take care of some maintenance tasks on your bike. This article how you how to clean and lubricate a motorcycle’s chain.
DIY Motorcycle Servicing
Of course, if you are like the majority of people out there, you will just take your bike into the nearest shop to have everything taken care of. But, really, where is the fun in that? I mean, that doesn’t seem in tune with the bad-ass biker image that you have been cultivating, right? The good news is that you can, if that’s what you are looking for, get down and dirty by taking care of a few maintenance tasks on your motorcycle on your own. So, where do you begin?
Cleaning and lubricating your bike’s chain
The chain is, undoubtedly, one of the most important components on any motorcycle. It is also one of the servicing tasks that can be carried out by everyone, including beginner bikes. This article shows you how to clean and lubricate a motorcycle’s chain.
The great thing is that there are so many great videos floating around out there, including on YouTube, that show you how to clean and lubricate a motorcycle’s chain. You only have to check out the above video to find out what we are talking about.
- What type of chain do you have?
This is a question that you need to ask yourself before starting the process of cleaning and lubricating your motorcycle’s chain. Chains come in two different configurations;
Non Sealed Chains
Non O Ring chains are the easiest to clean. They have been around for a long time and can be found in a wide range of bikes even today. The great thing about this type of chain is that it is cheap, light and strong. Non O Ring bike chains do not, however, come with internal lubrication. This makes them somewhat susceptible to early wear and tear.
Sealed
Sealed chains are more in sync with today’s motorcycle power trains. The main difference between them and Non O Ring chains is that they come with sealing rings that are position between chain’s inner and outer plates. The chains come with grease sealed within the rings.
There is, therefore, need for greater caution when working with this type of chain. What you do not want to do is damage any of the seals, which would let the grease out and, therefore, shorten the chain’s lifespan.
- Get your bike where everyone can see you
If you are interested in getting everyone see you working on your ride, the next thing that you need to do is get your motorcycle where everyone can see you. Kidding aside, you need to have enough space to be able to wiggle around a bit. You are going to be sitting or squatting in a fairly uncomfortable position for a couple of minutes, and you need some space to be able to alleviate the pain.
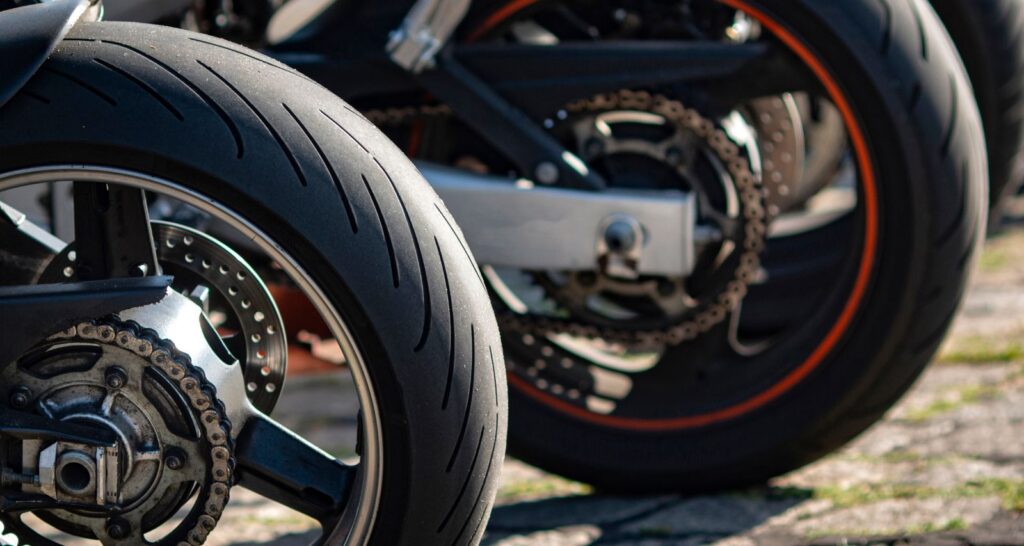
The task becomes easier if you have a center or paddock stand for your motorcycle. This gives you the ability to raise the rear wheel off the ground which, in turn, makes it easy to rotate the wheel while cleaning the chain.
- Check out the chain
If you decided to work on your bike’s chain after suspecting that something was wrong with it, you now need to thoroughly inspect it. You may find that, instead of carrying out a cleaning job, it may actually be necessary for you to change the chain altogether. Has you chain become loose? If that is the case, then, save yourself the time by getting a new one. You also need to take a look at the master link. This is the piece that is used to join the two ends of the chain together. If it looks damaged, it may be time for you to consider getting a new chain.
- Use Chain cleaner
Now that you have determined that your motorcycles’ chain does not really needs to be replaced, your next steps involves the use of a chain cleaner to remove dirt and grime from the chain. There is a wide range of cleaning solutions that can be used on motorcycle chains.
- Scrubbing the chain with a chain brush
After applying the motorcycle chain cleaner, the next thing that you need to do is scrub the dirt off. Buying one of the chain brushes that can be found out there simplifies the job for you. Make sure, though, that you have thoroughly cleaned all parts. If the chain is sealed, you need to be thorough but gentle while cleaning it.
- Drying the chain
Now that you have removed every bit of potentially damaging gunk from your bike’s chain, your next step involves drying the chain. Make sure that no moisture remains in preparation for the next step.
- Lubricating the chain
Re-lubricating your bike’s chain is, of course, the most important task in this entire process. There are, again, a wide range of lubricants that you can use to finish off the job. You do have to remember, however, that if you have a non sealed chain on your bike, you need to liberally apply lubricant.
That is because this is what gives the chain a longer life. If, however, your bike has a sealed chain, lubrication is handled by the grease that is sealed within the chain. You still have to apply lubricant to the outside, but that is mainly to stop the chain from rusting.
Transporting your bike
Now that you have shown everyone that you can work on your badass bike on your own, your next steps involves taking the motorcycle for a test drive. If, however, you would like to have the bike transported somewhere, (the Sturgis Motorcycle Rally, as an example,) why not call on the services of professionals who will get it there in pristine condition?
At AA Motorcycle Shipping, we have, over the years, built up a reputation for being the best bike shipping company in the United States. With us, all that you need to do is go to the home page on this website and enter all the details about where you are and where you wish to have your bike shipped. We will give you an unbeatable quote right away. What’s more, we guarantee that the quote that we give you is what we will charge you; with no upselling!


